 |
![]()
Lesson
Three: Navigating the Virgo Cluster
by John Barra
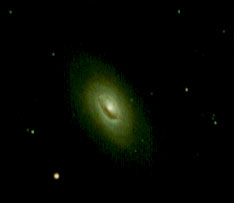
M-64
![]()
![]()
![]()
Attempting
to find ones way through the Virgo Cluster for the first time can be
a daunting experience. Many galaxies can be found in this cluster at the
Virgo/Coma Berenices border. And very few bright stars are there as guideposts.
Following a few sensible steps should allow you to accomplish this feat
if you have become competent at starhopping. However, instead of starhopping,
you will learn the art of galaxy hopping. This lesson is limited to locating
those fourteen Messier galaxies in the cluster. The non-Messier galaxies
are at least one magnitude dimmer and more difficult to find. And the
other Messier objects in these two constellations that are not in this
cluster can be located using the traditional starhopping techniques.
Have a Good Working Chart
The very first thing that is needed is a good working chart. You will need to use this chart both to plan your path, as described later, and at the telescope, as you try to navigate your way through the cluster. Charts need to have stars plotted to the approximate magnitude of the dimmest Messier galaxy in the cluster, magnitude 10. If your chart only has bright stars, you will soon get lost. If they have stars that are too dim, you will soon get confused because of too many stars. I prefer using Uranometria 2000.0. It plots stars to around magnitude 10 and has a handy grid with the declination lines at 1° intervals. You can use any good star book or computerized chart as long as it is easy to follow and has the appropriate magnitude limit. Whatever chart is used, a Xerox or other field copy is a necessity. Be aware of the direction that your telescope will have to be moved and the orientation of the field in your scope versus that of your map. For example, refractors generally will give a mirror or reverse image. If you have a chart or computer program that can match the two, do so.
Choose a Path
The
most important part of this process is to choose a good path. Take a look
at your star chart and determine the easiest order to locate the objects.
It matters not so much where you start as long as the starting point is
easy to find and as long as your path will have the least, if any, dead
ends or backtracking. I use the path suggested in the May 1994 Sky & Telescope
article: Mastering the Virgo Cluster, by Alan MacRobert on page 42.
It includes ten of the Messier Virgo Cluster galaxies. You can make a
copy of the article at any large library that carries back issues of the
magazine. While the map has a black background and therefore cannot be
copied as a good field chart, the article describes the path in great
detail and has some good photographs of the Virgo galaxies. This path
starts with a bright star Epsilon Virginis, which has a small asterism
next to it that points in the right direction. I added the asterism to
my chart. I then starhop to 41 and 34 Viriginis to my first galaxy, M60.
You may find an easier way to get to M60. Below is the path I use to galaxy
hop through the cluster, adding the four not included in the MacRobert
article:
1. M60, then to:
2. M59, then to:
3. M58, then to:
4. M89, then to:
5. M90, then to:
6. M91, then to:
7. M88 At this point, you need to backtrack to M89 (i.e. Go from M88 back
to M91 back to M90 and finally back to M89) before moving on to the last
seven galaxies:
8. M87, then to:
9. M86, then to:
10. M84, then to:
11. M99, then to:
12. M98, then to:
13. M100, and finally to:
14. M85 In designing your path or chart, pay attention to the angles that
the line between two galaxies make to the line to the next galaxy. Also
be aware of the relationship of the approximate distances between the
pairs. For example, I noted in my path that M60, M59, and M58 are all
in a straight line and that M58 is about twice as far from M59 as M59
is from M60. Then M58 to M89 is at about a 135° angle from the M59-M58
line but they about the same distance apart. There are a few other things
you want to make note of or add to your working chart. Note any bright
stars, close doubles or asterisms that are in the path to or are near
your targeted galaxies. If you find a fainter asterism in a different
chart but within your scopes ability and it will help you find or confirm
a galaxy in the field, add it to your field chart.
At the Telescope
Now that you are at your telescope in the field, find your starting-point star and begin to follow the path you have charted. Lower power is used for hopping and locating while higher power is used for confirming. Use all the techniques previously taught in the earlier lessons such as averted vision. Once you have confirmed that you found a specific Messier galaxy, dont be afraid to add any star, asterism, or any other object which was not in your chart but which will make it easier to locate that galaxy the next time. If you get lost at any point, dont get frustrated. Go back to the start and begin again. You will now able to travel quickly to the last point before you got lost. Try to find the next object and learn what you did wrong on your last attempt. You might not make it through the entire cluster the first time. But each time you try will make it easier. Once you have completely navigated the cluster, you may even want to make changes to the path or other appropriate additions to the chart. Future attempts will be completed faster. You can then go back and add other fainter NGC Virgo galaxies to your chart and try to find them. Or just go out to the next star party and show off your new skills. But once you have found all the Messier galaxies in this tough cluster, you hopefully will have completed the Messier list and be eligible for an Astronomical League award.
![]()
NEXT ISSUE: PRIMER FOR THE ADVANCED LESSON FOUR: LOCATING PLUTO
![]()
copyright © Peoria Astronomical Society 1994-2004.